


Everything You’ll Need
Tool Checklist: Ceramic vs. Porcelain Tile
| Tool / Material | Ceramic Tile | Porcelain Tile | Purpose |
|---|---|---|---|
| Tape Measure | ✔ | ✔ | Measure room size and tile spaces |
| Chalk Line | ✔ | ✔ | Mark lines and guides |
| Straight Edge | ✔ | ✔ | Help with straight cuts and lines |
| Pry Bar | ✔ | ✔ | Take out baseboards or old floors |
| Spacers | ✔ | ✔ | Keep grout spaces even |
| Notched Trowel | ✔ | ✔ | Spread mortar on the floor |
| Mixing Paddle & Drill | ✔ | ✔ | Mix mortar and grout right |
| Wet Saw or Tile Cutter | ✔ | ✔ | Cut tiles for edges and corners |
| Utility Knife | ✔ | ✔ | Trim underlayment or score board |
| Level | ✔ | ✔ | Make sure tiles are flat and even |
| Grout Float | ✔ | ✔ | Press grout into joints |
| Bucket & Sponge | ✔ | ✔ | Clean tiles and remove grout haze |
| Knee Pads | ✔ | ✔ | Protect knees when on the floor |
| Safety Glasses | ✔ | ✔ | Protect eyes when cutting |
| Gloves | ✔ | ✔ | Protect hands from sharp edges |
| Cement Backer Board (if needed) | ✔ | ✔ | Support tiles and resist water |
Optional (But Helpful):
| Tool / Material | Purpose |
|---|---|
| Rubber Mallet | Tap tiles softly into place |
| Tile Nippers | Make small, precise cuts |
| Grout Sealer | Seal grout to keep out water and stains |
Step 1: Prepare the Space
Take Off Baseboards and Old Flooring
First, take off the baseboards and old flooring to see the subfloor. This makes a nice, flat surface for your tile.
Use a pry bar to gently take off the baseboards without breaking the walls. If you have carpet, cut it into small pieces and remove any sticky stuff. For old tile, use a hammer and chisel or floor scraper to take off the tiles and mortar.
Clean the Subfloor Well
Sweep and vacuum the subfloor to get rid of all dust and dirt. A clean surface helps the mortar stick right and keeps your floor looking good.
Check for Damage or Wetness
Look at the subfloor for cracks, holes, or bumpy spots. Use a level to see if there are any dips or high places.
- Cracks or holes: Fill them with a patching compound.
- Uneven areas: Use a floor leveling compound to make it flat and steady.
If you have concrete, check for wetness with a moisture meter. Too much moisture can mess up the tile or grout, so fix any wetness before you start.
Put in Underlayment or Cement Backer Board (if needed)
Depending on your subfloor type:
- Wood subfloors: Put in cement backer board to make a strong, water-resistant base.
- Concrete subfloors: Usually don’t need underlayment, but a crack isolation membrane or waterproofing membrane might be suggested sometimes.
Secure backer board panels following the maker’s instructions, using the right screws and leaving the right gaps between panels.
Step 2: Plan Your Tile Layout
Find the Center of the Room and Mark Guidelines
Start by finding the room’s center. Measure the middle of each wall and draw chalk lines across the floor. The crossing point is where you’ll begin laying tiles. This makes your tile layout look even and balanced.
Choose Your Tile Layout Pattern
If you’re new to this, it’s smart to use simple patterns:
- Straight Lay (Grid Pattern): Tiles are placed square with the walls, forming neat rows.
- Diagonal (Diamond Pattern): Tiles are set at a 45-degree angle to the walls for a lively look — a bit harder but doable.
Note: Complex styles like herringbone or chevron need more skill and aren’t advised for beginners.
Dry-Fit Tiles to Check Alignment
Lay some tiles without mortar (called dry-fitting). This lets you:
- Check if everything lines up and spaces correctly.
- See how tiles fit near walls, cabinets, or doors.
- Adjust to avoid thin tile pieces at edges, which can look odd and crack easily.
Spacing and Grout Lines
Use spacers between tiles during dry fitting to ensure even grout lines. Common spacer sizes are 1/8 inch or 3/16 inch, based on tile size and style.
Calculate Tile Quantity (Add 10–15% for Waste)
Find the room’s square footage (length × width). Then:
- Multiply the total square footage by 1.10 for simple patterns or 1.15 for diagonal or complex layouts to cover cuts, mistakes, and future repairs.
- Order that amount of tile to have enough for the whole project.
Step 3: Choose Your Installation Method
For most tile flooring projects, especially bigger spaces, thinset mortar is the best way to install tiles. It makes a strong, lasting hold between the tiles and the floor.
Common Methods:
- Thinset Mortar (Recommended)
This cement-based glue is great for floor tiles. It handles weight, moisture, and temperature changes well. Both beginners and experts use thinset because it’s strong and reliable. - Tile Adhesive (Mastic)
Good for small DIY spots or wall tiles in dry areas. It’s easier to use but not strong enough for most floor projects or wet places.
Note: For floor tiles, thinset is usually the best and safest option.
| Installation Method | Best For | Strength & Durability | DIY Friendliness | Notes |
|---|---|---|---|---|
| Thinset Mortar | Floor tiles, wet places (bathrooms, kitchens), big spaces | ⭐⭐⭐⭐⭐ (Excellent) | Moderate | Standard for tile flooring. Handles moisture, weight, and movement well. |
| Tile Adhesive (Mastic) | Small dry places, wall tiles | ⭐⭐ (Limited) | Easy | Not good for floor tiles or wet places. Quick to apply but less durable. |
Step 4: Mix Mortar and Apply to Subfloor
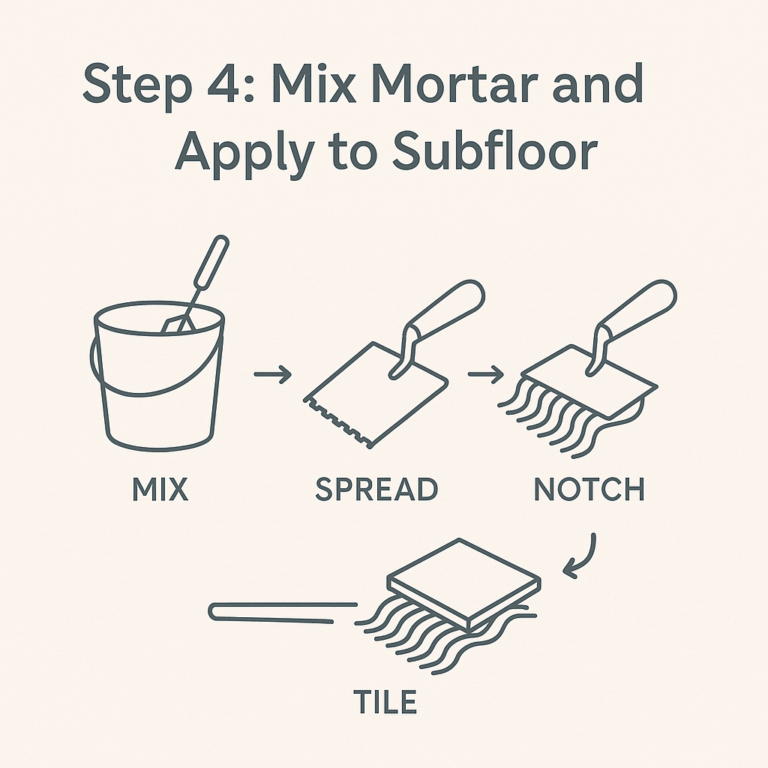
Mix the Mortar
Begin by following the instructions to mix the thinset mortar. Use a clean bucket and a drill with a mixing paddle to get a smooth mix. Allow it to sit for a few minutes, then mix again before using.
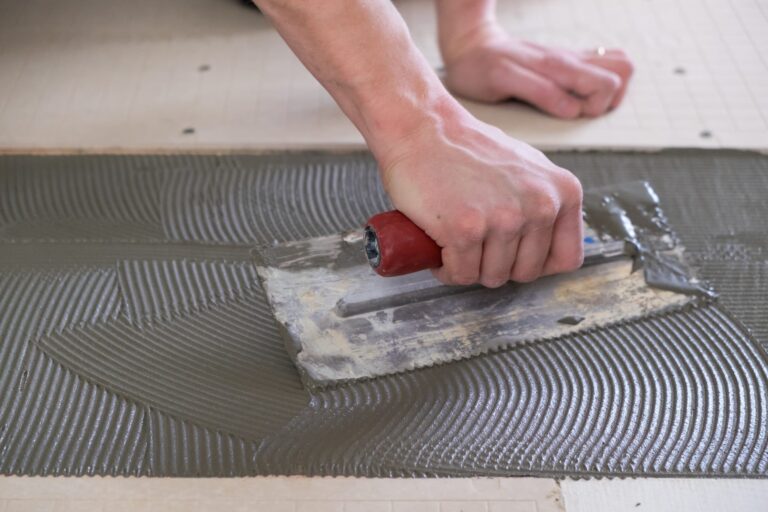
Spread the Mortar
Take a notched trowel to spread the mortar on a small part of the subfloor. Hold the trowel at a 45-degree angle to make even ridges. These ridges help the tiles stick well and set at the right depth.
Work in Small Sections
Only cover an area you can tile in about 10–15 minutes. This stops the mortar from drying before placing the tiles.
Pro Tip:
For larger tiles, apply a thin layer of mortar on the back to help them stick better, especially if they are over 12 inches.
Step 5: Lay the First Tiles
Start right to make the whole project go smoothly.
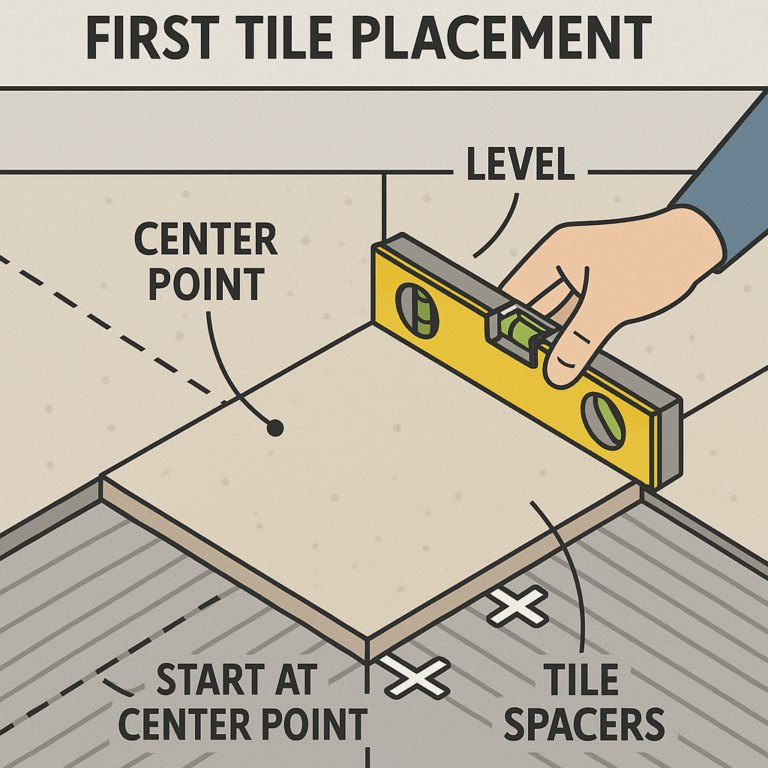
Start at the Center Point
Use chalk lines from your plan to begin at the room’s center or main area. This makes sure tiles are spread evenly.
Place the First Tile
Put the first tile in the mortar. Press hard and twist a little to make it stick well.
Use Tile Spacers
Add spacers between tiles to keep even gaps for grout. This helps it look neat and professional.
Check for Level
After laying a few tiles, use a level to make sure the surface is flat. Adjust before the mortar dries.
Quick Tip:
Work in small areas so the mortar doesn’t dry before tiles are placed!
Step 6: Cutting Tiles to Fit
Cutting tiles accurately gives a nice, professional finish.
Measure and Mark
Use a tape measure to find the tile size you need. Mark the line with a pencil or wax pencil.
Choose the Right Tool
For straight cuts, use a manual tile cutter.
For curved or detailed cuts, use a wet saw or an angle grinder with a diamond blade.
Cut in a Safe Area
Always cut outside or in a place with good airflow to avoid dust. Wear safety glasses and gloves to stay safe.
Pro Tip:
Measure twice before cutting to save material and get a perfect fit!
Step 7: Install Remaining Tiles and Let Mortar Cure
Begin by setting the first tiles and then lay the rest one row at a time. Start from your chosen point and place each tile carefully using spacers to keep grout lines even. Often check that tiles are level and adjust them if needed to avoid uneven surfaces.
As you lay tiles, avoid stepping on the new ones to prevent them from moving. Work in small sections so the mortar does not dry before the tiles are in place.
Once all tiles are installed, let the mortar cure for at least 24 hours (or follow the manufacturer’s advice) before grouting. Proper curing is important for a strong and lasting tile floor.
Step 8: Apply Grout
After the mortar sets, it’s time to grout between the tiles:
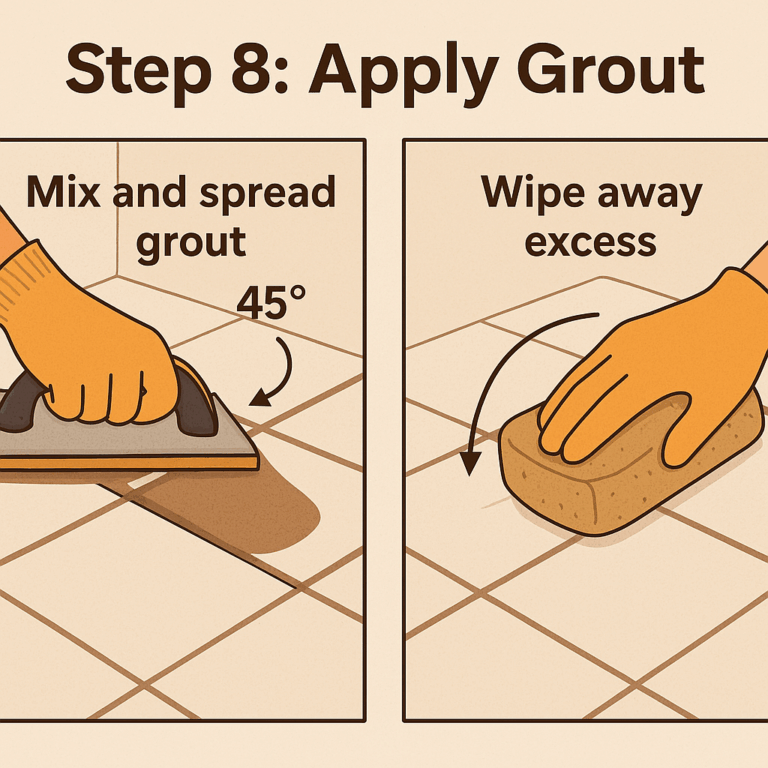
Mix the Grout
Mix the grout to a smooth consistency like peanut butter, following the instructions.Spread Grout Using a Float
Hold a rubber grout float at 45° and spread grout over the tiles. Press hard to fill all the joints.Remove Excess Grout
After filling, hold the float at a steep angle to scrape off extra grout from the tiles.Clean the Tiles with a Damp Sponge
Wait 10 to 15 minutes, then gently clean the tiles with a damp sponge. Rinse the sponge often and keep grout in the joints.Final Buffing
When grout starts to haze on the tile (after 30–60 minutes), use a dry microfiber cloth to buff and clear any haze.
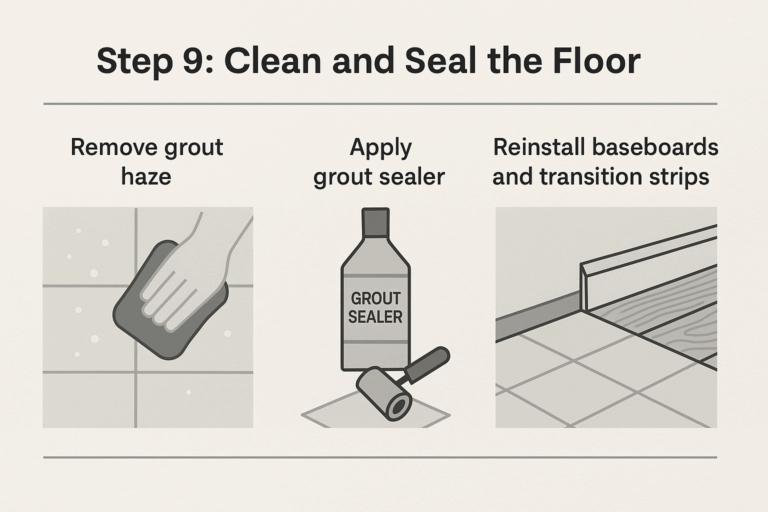
Step 9: Clean and Seal the Floor
Remove Grout Haze
After the grout dries (usually 24 to 48 hours), a hazy layer will show up on the tiles. Use a damp sponge or special grout haze remover to gently clean them. Be careful not to mess up the grout lines.
Apply Grout Sealer
If the grout maker suggests it, put on a grout sealer to protect from water, stains, and mold. Use a small brush or a sealer bottle with a roller tip for accuracy. Let the sealer fully dry as the instructions say.
Reinstall Baseboards and Transition Strips
When all is clean and dry, put back your baseboards and add any needed transition strips between flooring types or rooms. This gives your new tile floor a nice, finished look.
DIY vs. Professional Tile Installation
Installing tile floors yourself can save money, but it might not be the best for every project. Here’s how to choose between DIY and hiring a pro.
DIY Benefits
- Costs less upfront
- Work at your own speed
- Good for small, simple spaces (bathrooms, laundry rooms)
DIY Drawbacks
- Takes time, accuracy, and special tools
- Mistakes can be expensive
- Hard for tricky layouts or big areas
Professional Installation Benefits
- Expert accuracy and lasting quality
- Faster finish, great for large areas
- Includes subfloor work, cutting, and cleanup
- Often includes warranties
Professional Installation Drawbacks
- Costs more upfront
- Less control over schedule
Cost Comparison
Here’s what you might pay:
| Installation Type | Average Cost per Sq Ft | Typical Total for 250 Sq Ft |
|---|---|---|
| DIY Installation | $2 – $8 (materials + rental tools) | $500 – $2,000 |
| Professional Installation | $8 – $25 | $2,000 – $6,250 |
👉 For more details, see our Tile Flooring Cost Guide.
Pro Tips for a Successful Tile Flooring Installation
Want great results from your DIY tile project? Remember these tips:
- Organize tools and tiles before starting. Keep them within easy reach.
- Use a good wet saw for neat cuts, especially with porcelain tiles.
- Mix small amounts of mortar and grout. This keeps them from drying out too soon.
- Check for level often with a spirit level as you lay tiles.
- Work in small areas. This helps the mortar stay wet while placing tiles.
- Reduce breakage. Cut tiles slowly and wear safety glasses.
Common Mistakes to Avoid When Installing Tile Flooring
Even experienced DIYers can make these mistakes:
- Not leveling the subfloor. An uneven subfloor can cause cracked tiles.
- Forgetting spacers. This leads to uneven grout lines.
- Walking on tiles before the mortar sets. This can move tiles out of place.
- Using too much or too little mortar. This affects adhesion and tile position.
- Not cleaning grout haze quickly. It gets hard to remove if left too long.
Do You Need Professional Help With Your Tile Flooring Installation Project?
After learning how to install tile flooring, you’re ready to make a strong, beautiful floor that lasts long. But if you’d like experts to handle the details like leveling and grouting, we can help.
Our skilled flooring installation team manages everything, from preparing the subfloor to laying and sealing tiles, ensuring a perfect finish. We’ll assist in choosing the best tile style and materials for your needs and budget.
Contact us today to schedule your free in-home consultation and see if we serve your area!


